This year I got to attend the Labyrinth Masquerade Ball in LA. This event is beyond phenomenal, the cast did an amazing job of creating multiple wonderful worlds, the entertainment was top notch and the costumes were to die for (I seriously recommend checking out the pictures on the website or facebook). The whole event felt so immersive. We opted to attend the preshow, where you tour through the space with various cast members. This was very worth it, the cast members were amazing and worked hard to orient the new people and to show you some of the unique things for the event. We also attended the tea, which was amazing in both food and unique teas designed specifically for the event. I did take at least some pictures, so here are a selection from this magical event.
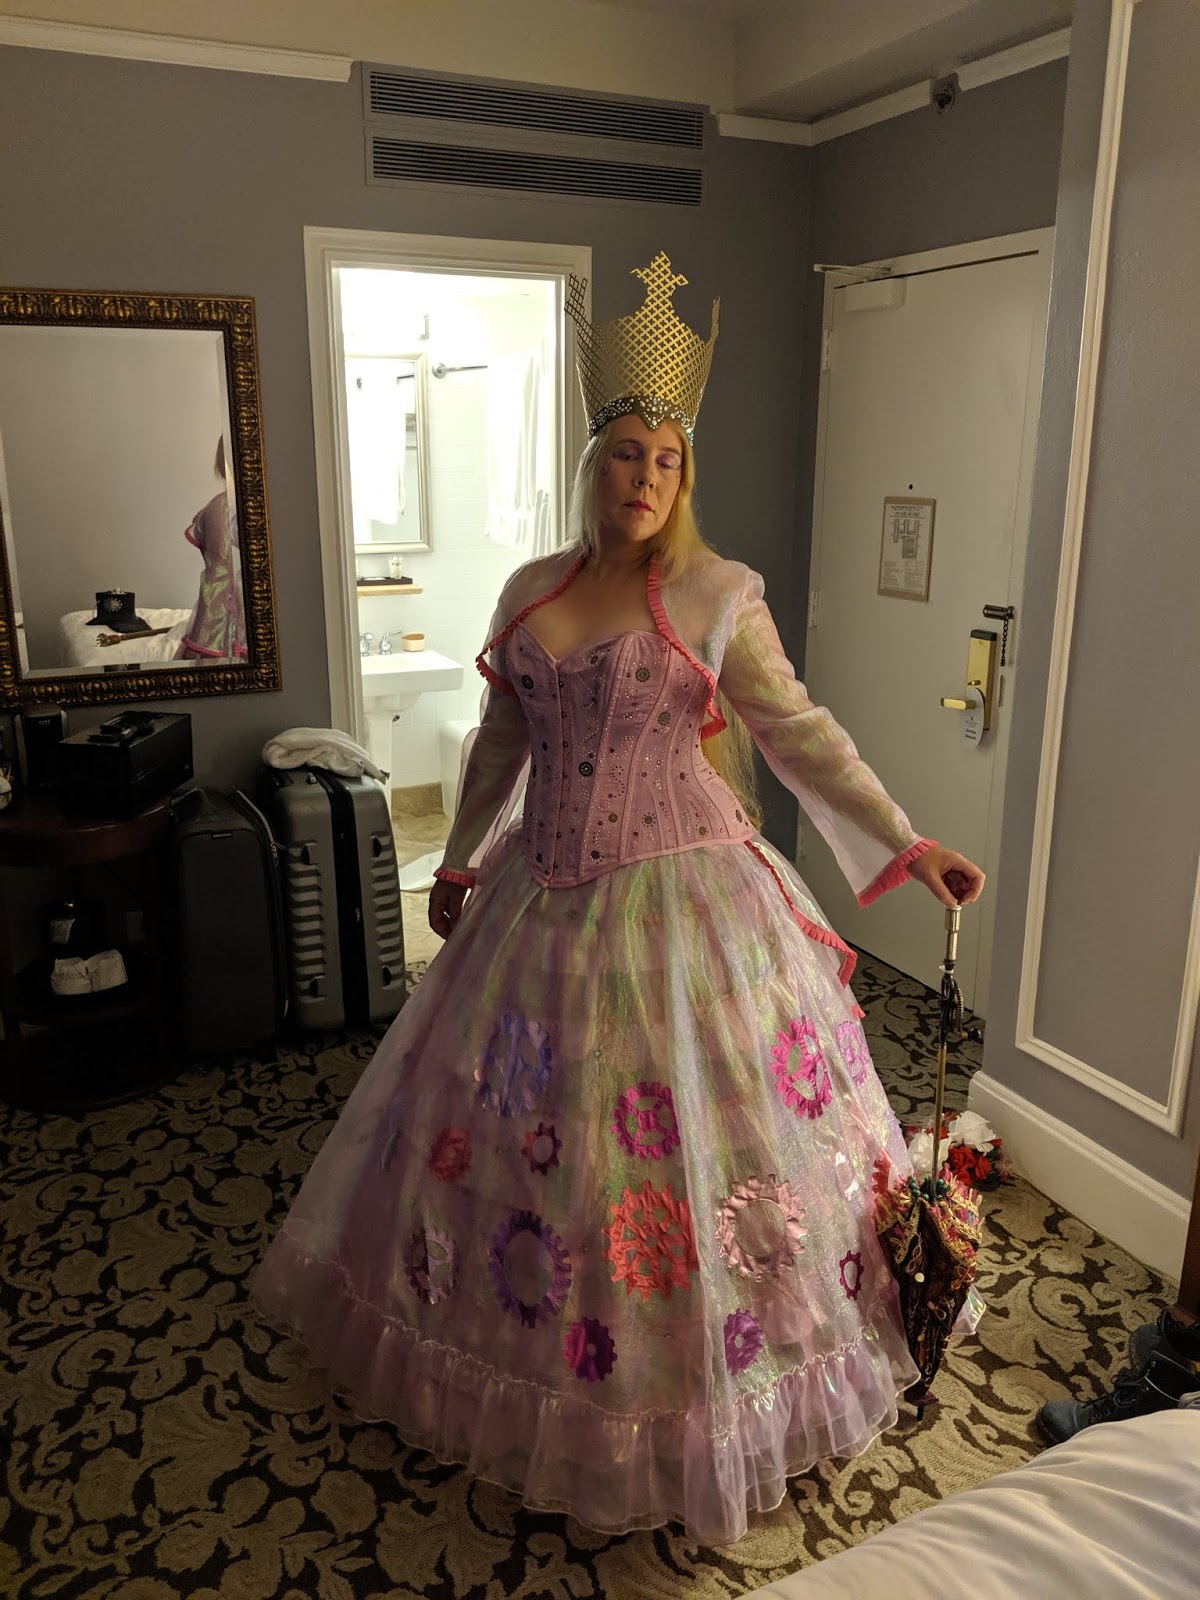
First, here is our outfits for the first night taken before we headed down to the ball.
There were so many amazing costumes, I captured only a handful of them, but here are some of my favorites we got to see first hand. However, just looking at the facebook photos, we missed so many amazing costumes in the crowd! I highly recommend this event for the sheer love of costume and hope to go again some day!
Out of this whole costume the skirt took the longest simply due to the fact that I really wanted it to light up and stitching tons of LED wires by hand is really really slow.
The skirt is 2 layers, the bottom layer is smooth, pink, pearlized, sheer fabric. It is a basic A-line cut gathered into a pink elastic waist band. The simple cut let me stitch LED strings all over this base skirt. The LEDs are Flora RGB neopixels from Adafruit, these can produce full 24-bit color, are ultra-bright, can be chained together and can respond rapidly to programmed instructions. Each stand in the skirt is 8 Flora neopixels strung together with clear wire and there are 8 strands. You can use conductive threads for these, but the loss in conductivity over the length of the skirt would be too much, so for this size project, I used wire. Once wired, I stitched the LED strands to the skirt. The stitching pattern was random and the strands were designed to have different spacing between the LEDs to make it a little more organic looking.
The wiring all runs to a pouch under the bustled overskirt which is high enough that I don't sit on it, but low enough that it is not under the corset. The Arduino controller and the LiPo batteries are held in this pouch.
The overskirt is much fuller than the underskirt and is made of crinkled, pink, pearlized, sheer fabric. The overskirt is floor length in the front and slightly longer in the back to allow the skirt to be bustled slightly by tapes in the back (you can see 2 of the white ribbon tapes for the bustle in the pouch photo). The ruffle at the bottom of the skirt goes all the way around the skirt. To the front of the skirt, I cut out gear shapes in random shiny fabrics I had laying around. These fabrics were gifted to me and were 1/8 yard strips in 16 colors, I used all the pink tones for this skirt. These two fabrics (the pearlized sheer and the slippery shiny stuff) were horrible to sew and every attempt I had to applique this stuff failed, so the gears are glued on with fabric glue.
To the back, I added a couple of elements to enhance the bustle, these were based on 1860s fashions were you start to see extra stuff down the back, but the skirts still have fairly round hoop support. The added bits are pretty free form, there are several layers of basically quarter circles with trim added to the back.
The arduino in the skirt allows the LEDs to have several programs that the skirt cycles through every 30 seconds. The first is a red raindrop effect, the second one is a blue snow shower effect and the last one is a rainbow blinking effect.
In case the videos aren't working, here is a quick picture of pattern 3.
Normally I prefer to make my own corsets, since they always fit better if they are made specifically to your measurements and bespoke corsets out of my price range. However, for this outfit, I needed to get the corset done quickly and did not have a pattern than fit the bill. So I bought one cheaply from Corset Story. Their waist taming corset line allows a 5 inch reduction and are reasonably comfortable. The one I bought was a white satin one intended for weddings, but I really wanted pink.
The corset satin is polyester, but with the new Idye poly dyes I figured I could get at least a light pink from the white satin. I did not have a pot big enough to keep the heat high (as per the dye instructions) so I boiled the dye and then poured it into a plastic tub and dropped the corset into the heated dye. Since the corset would not be in hot dye for the required time, I bought fuschia dye and hoped for the best. I then swished the corset in the dye until it cooled (about 10 minutes) and rinsed it out with cold water. The inside of the corset was cotton and turned the same fuschia as advertised. The outside of the corset turned a pale pink, basically the color of my pointe shoes as a girl. The corset lace did not dye at all evenly, so I bought gross grain ribbon and replaced the lacing. Interestingly, the corset is pretty color fast. I have worn this corset and danced in it for several hours and it doesn't transfer on to me or onto my white corset liner.
Once the corset was dyed, I stitched gears all over it and then attacked the corset with rhinestones for bling and little pink skull studs. I decided to use hot fix stones, which do not recommend...... For one, any small slip with the heated tool melted the polyester satin and there are several burn marks from this. Second, not all of the stones adhered well, so I have to re-glue some of the stones periodically. Third, the tool would periodically get too hot and I would have to stop to cool it down or risk burning my fingers just holding the tool. Use of E6000 like on the crown would have been better.
I am basing this costume (loosely at least) on the original Glinda the Good Witch from the Wizard of Oz movie, so I needed a crown. Looking at images of Glinda the Good Witch showed me that her crown is basically as tall as her head! So that meant I needed to create a really tall crown pattern. I basically messed around with butcher paper until I had something I liked.
I know it is hard to get a guess on size off a picture, but the crown pattern is very tall. The crown in 6.25 inches tall for the base and 11.5 inches tall to the top of the points.
I am going to apologize now, this next part gave me quite a bit of trouble and I forgot to take pictures of the construction. Since this is a steampunk rendition, I decided the crown should be made of metal, and preferably copper or brass colored. I also wanted it to be lightweight so it wouldn't hurt to wear. I decided to use decorative sheet metal from the hardware store, it has a cloverleaf pattern punched in the sheet metal and a bronze color (link to what I purchased). One thing to note, the bronze color is only on the surface, I found this out when I used a wire brush on my Dremel to clean up the flux from soldering. Once cut, this sheeting is really easy to shape and bend into the crown shape. We then soldered the crown closed in the back using a piece of brass to strengthen the crown (this stuff is really really pliable on its own). Since the metal was a bit sharp, I edged the bottom with leather both inside and out.
The leather looked kinda plain, and the original crown is really pretty decorated, so I grabbed some rhinestones and went to town.
Here is the finished crown. The weld in the back is pretty ugly (see the last picture), this stuff was not the easiest to solder. Other than the back seam, I am pretty pleased with the crown, as it is really lightweight and comfortable. My only concern now is how I will manage to fly with it to the event so I can actually wear it!
My husband and I are planning to attend the Labyrinth Masquerade Ball this year and are in need of costumes. Since time is short and there is not time to do a completely new costume, I am trying to finish up a costume I started a few years ago, a Steampunk Glinda the Good Witch. This costume was wearable, but very unfinished, so this is a good opportunity to finish it up.
The first issue is that the hoop skirt I originally made for it is 1 inch wide steel bands riveted to leather. While this is really fun to wear, it wont fit in the suitcase as it doesn't fold or bend at all.
To get a hoop that can fly with me, I purchased a cheap bridal hoop. This hoop can be folded up to fit in a suitcase, but is made out of something that feels like a cheap tent......
The overskirt to this dress is actually sheer so the hoop will show at
least a little bit and I also wanted to be able to wear the hoop without
the overskirt. So I went to the local fabric store and bought some bright pink sheer stripe and iridescent PVC to remake the hoop skirt into something Glinda appropriate.
I made a bunch of strips of the sheer stripe to make ruffles and strips of the PVC to cover the hoops. The hoops were then suspended from ribbons hung from the waist band. This hoop was pretty simple to make but very very time consuming. The PVC is absolutely nasty to sew on, it sticks to the foot of my machine. I have heard there are special feet that can handle this stuff, but none of the ones I have did a good job, so I resorted to the old tried and true method. I covered the PVC with thin tissue paper, stitched through the tissue paper and then tore it off the seams when finished.
The first piece I needed to create was the underdress with red and blue embroidered sleeves. I decided to do a wider saya encordada and pellote through the chest area based on the saya encordada and pellote of Leonor of Castilla, rather than the lady from the Book of Games. Since the chest area is covered with the wider saya, I did not continue the embroidery onto the bodice. This also helped with the amount of time needed to create the underdress as I only had 2 weeks to complete the whole outfit! I wanted the embroidery to be geometric, as the embroidery in the manuscript image also appeared geometric. I searched the web for simple embroideries that might have come from the rough time frame from Spain and did not come up with anything I could do quickly or simply. I broadened my search and found a lovely set of embroidery charts made from extant items by the talented Miriam bat Shimeon. These are middle eastern and many of them are Egyptian, but the look was right for 2 color geometric. Here is a link to her website with her amazing charts. I used two of her charts
Cuff, based on Egyptian 10-15th CE embroidery, charted by Miriam Staples
Sleeve embroidery, based on 10-15th CE embroidery fragment, charted by Miriam Staples
The embroidery actually went really fast and I am pleased with the overall look. Samples from Egypt may be a stretch for Spanish dress, but I felt they were good enough for my needs and fit the look I was going for.
The underdress is rectangular construction made linen. The internal seams were machine sewn due to time constraints but I had sewed the hems of the neck and sleeves since they show.
The next part was the saya encordada, thankfully this dress has lots of information readily available online. The seam lines have been drawn by Marc Carlson (here), making pattern drafting really easy. The gown is made of faux silk, as I had it on hand. The lacing was done as described in the previous post, I hand stitched ribbon to the inside of the gown with channels to allow lacing. The original was laced with cord, but I used ribbon, as I had it on hand. The bodice of my saya encordada is hand sewn and self lined to the hips.
The final piece was the pellote. For this, I used some blue wool I had laying around. The pattern for the pellote was based on the cutting diagram from Marc Carlson (here). Unfortunately, this wool will stretch, so I bound the arm holes with cloth tape and added some trim to make it a bit more decorative since the tape make the edge very plain. As with the other dresses, I had sewed the neckline.
Overall, I am pretty pleased with this outfit. Unfortunately, I do not have any pictures of me wearing it. I did not get much of a chance to wear it, as my cat was in the ICU the day of the event (he has since fully recovered).
I planned on attending a Midwinter feast in December, the theme of which was in the 13th Century and Spanish. The actual theme was Battle of Las Navas de Tolosa, 1212. In searching for a dress I wanted to create, I was loose with the date, as I fell in love with Leonor de Castilla's underdress and over dress, which are dated 1244.
Here underdress, the saya encordada, was very fitted, laced up one side and made of beautiful brocade.
Saya encordada of Leonor of Castilla
A lovely link from Jessamyn's Closet shows the lacing detail from the Saya Encordada demonstrating that the side lacing cord is run through a tape stitched to the inside of the opening.
Her pellote was also of a beautiful brocade and is sideless. The brocade on this gown is amazing.
Pellote of Leonor of Castilla
Brocade detail
Unfortunately, I had no luck finding anything similar that I could get in time for the event (or in my price range). So I had to come up a plan B.
A friend of mine told me about Libro de los Juegos, ("Book of games"), commissioned by Alfonso X of Castile and dated 1283. The pages of the Book of Games are available online and browsing through them I saw a number of women in the same style of dress. One of them really caught my eye.
The lady appears to be wearing a white underdress with red and blue embroidery on the sleeves and probably on the bodice. Over this, she is wearing a red saya encordada and a blue sideless gown. She appears to have a pink cloak on as well. These more simple solid color fabrics were possible in the 2 weeks I had to sew an outfit!